A sneak peek at our complete application
Prerequisite: This tutorial assumes you have installed an Odoo instance and the necessary development environment. In case you have not, please follow the official documentation from Odoo - here.
Odoo follows a Model-View-Controller (MVC)-like architecture, and we will go through the different layers to implement our cat cattery application in the following steps:
Step 1: Create a New Addon Module
1. Preparing The Addons Path
An addon module is a directory containing an Odoo manifest file providing features, such as a new app or additional features for an existing app.
An app is the top-level module for a feature area in Odoo, and we expect our module to be featured in the top-level Apps menu, while a non-app addon module is expected to depend on an app, adding or extending features to it.
If a new module adds new or major functionality to Odoo, it probably should be an app. If the module just makes changes to an existing app, it probably should be a regular addon module.
For our Cat Cattery app, let's create a ~/work17/project directory and include it in the addons path. We can do this by editing the configuration file directly or by using the Odoo command-line interface (CLI). Here is how to do the latter:
Here's an explanation of the options used in the Odoo command:
• The --addons-path option sets a list of all the directories to use for Odoo modules.
• The -d or --database option sets the database name to use. If the database
doesn't exist, it will be created and initialized with Odoo's basic database schema.
• The -c or --config option sets the configuration file to use.
• The --save option used along with -c saves the options used in the
configuration file.
• The --stop option, short for --stop-after-init, stops the Odoo server and
returns to the command line once all actions are done and the start sequence is done.
Right now, the Odoo command will return an error such as this: odoo: error: option --addons-path: no such directory: '~/work17/project'. Don't worry, this is because the directory is still empty, and Odoo is not able to find any addon module inside it. We won't have this problem as soon as the skeleton for the first Cat Cattery app module is created.
2. Creating a module directory
The Odoo scaffold command provides a quick way to create a new module skeleton. We can use it to automatically populate the cat_cattery addons directory with a valid module structure:
The module directory created looks like this:
The directory contains several subdirectories for the different components of the module. This subdirectory structure is not required, but it is a widely used convention, we will expand on it as needed later on.
3. Preparing A Manifest File
A valid Odoo addon module directory must contain a __manifest__.py descriptor file. It also needs to be Python-importable, so it must also have an __init__.py file.
The manifest file, created by the scaffold command, should be a valid Python file containing a dictionary. None of the possible dictionary keys is required, so an empty dictionary - {}, would be a valid content for the file. In practice, we want to at least provide some basic description of the module, assert authorship, and choose a distribution license.
The following should be a good starting point:
We used the following keys:
-
name: For the module title. -
summary: For a one-line summary of the purpose of the module. -
author: For the name of the copyright author. It is a string but can contain a comma-separated list of names. -
license: This identifies the license under which the author allows the module to be distributed. AGPL-3 and LGPL-3 are popular open source choices. Proprietary modules sold through the Odoo Apps Store usually use the OPL-1 (Odoo proprietary license). -
website: A Uniform Resource Locator (URL) to get more information about the module. -
version: The version of the module. It should follow semantic versioning rules (see http://semver.org/ for details). -
depends: A list of the addon modules it depends on. The installation of this module will trigger the installation of these dependencies. If the module has no particular dependencies, it is a common practice to have it depend on the base module, but this is not required. -
application: A flag, declaring whether the module should be featured as an app in the apps list. Most extension modules, adding features to existing apps, will have this set to False. The Cat Cattery management module is a new app, so we usedTrue.
4. Setting the module category
Modules are grouped into categories, representing the function areas they relate to. These categories are used to group addon modules, and also the security groups.If no category is set on the addon, the Uncategorized value will be assigned. This is right now the category of our app.
If a non-existent category is used on an addon module, Odoo will automatically create it and make it available. We will take advantage of this to create a new category for the Cat Cattery app: Services/Pet.
Edit the __manifest__.py file thus to add a category key: "category": "Services/Pet",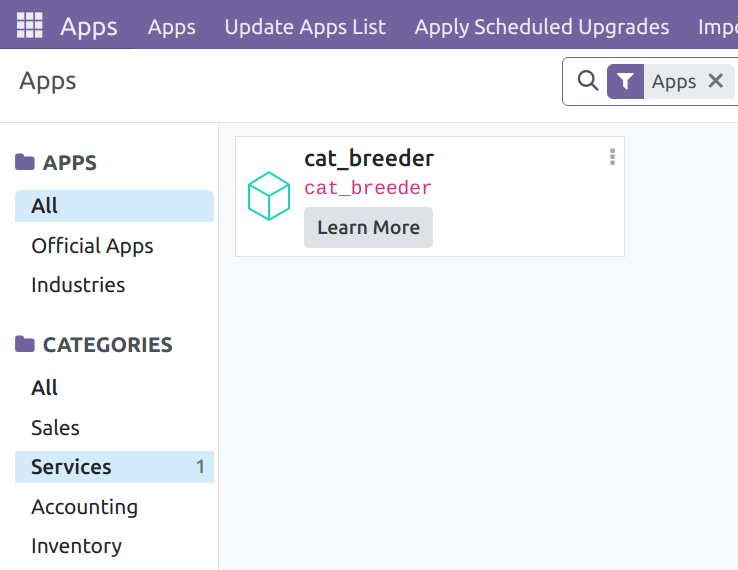
Categories are also relevant for organizing security groups, and to reference them in Extensible Markup Language (XML) data files, we will need to use the corresponding XML ID.
The XML ID assigned to a module category is automatically generated from the base.module_category_prefix plus the category name. For example, for Services/Pet, the generated XML ID is base.module_category_services_pet.
5. Installing A New Module
We now have a minimal addon module. It doesn't implement any features yet, but we can install it to confirm that it is working properly so far.
To install a new module, we should start the server using both the -d and -i options. The -d or --database option ensures that we are working with the correct Odoo database. The -i or --init option accepts a comma-separated list of modules to install.
The following command installs the cat_cattery module:
We added the -d project option to make sure that the correct database is selected for the installation, even if this option was already defined in the configuration file and is thus redundant, it is best to play safe and explicitly declare the database to install on in the command.
6. Upgrading Modules
Developing a module is an iterative process, with changes made on source files that are then to be applied to Odoo.
This can either be done from the graphical UI (GUI) by looking up the module in the Apps list and clicking on the Upgrade button, or the -u option, --update in the long format, requires the -d option and accepts a comma-separated list of modules to update.
(env17)$ odoo -c ~/work17/project.conf -d project -u cat_cattery
A module requires upgrading when the following applies:
- When modifying models or their fields, an upgrade is needed to apply the database schema changes.
- When changing logic Python code, a restart is needed to reload the code files.
- When changing XML or comma-separated values (CSV) files, an upgrade is needed to reapply the data in the files.
To help developers avoid having to Ctrl + C and restart Odoo every time an upgrade is made, in the more recent Odoo versions, the --dev options are made available where changes to data files will instantly be available to the running Odoo service, with --dev=all applies to all of the aforementioned changes:
Step 2: Create a New Application
An Odoo application is expected to have the following:
- An icon, to be presented in the app list (Optional)
- A top-level menu item, under which all the app's menu items will be placed
- Security groups for the app so that it can be enabled only for users that need it and where access security will be set
1. Adding A Top Level Menu Item
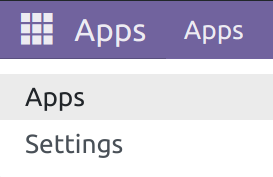
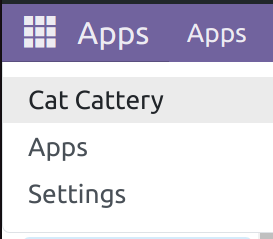
Since we are creating a new app, it should have a main menu item. On the Community Edition (CE), this is shown as a new entry in `the top-left drop-down menu.
Menu items are view components added using XML data files. To define a menu item, create a views/cat_cattery_menus.xml file with the following content:
The <menuitem> element is an instruction to write a record on the ir.ui.menu model, where Odoo menu items are stored. The id attribute is also known as an XML ID and is used to uniquely identify each data element, providing a way for other elements to reference it. For example, Cat Cattery submenu items added later will need to reference their parent menu item, using the cat_breeder_menu_root's XML ID.
Now, edit the __manifest__.py file dictionary to add and load this into the Odoo instance:
Make sure the module is upgraded for the changes to take effect.
2. Adding Security Groups
Before features can be used by regular users, access must be granted to them. In Odoo, this is done using security groups. Access privileges are granted to security groups, and users are assigned security groups.
Odoo apps typically provide two groups for two levels of access, as follows:
- A user access level, for users performing daily operations
- A manager access level, with full access to all features, including configurations
To keep things simple, our app will only feature the user security group.
Access-security-related files are usually kept in a security/ module subdirectory, so we should create a security/cat_cattery_security.xml file for these definitions.
Security groups are organized in the same categories used for addon modules. To assign a category to a security group, we should find the corresponding XML ID. The way this XML ID can be found was discussed earlier in this chapter, in the Setting/Module Category section. There, we can learn that the XML ID for the Services/Pet category is base.module_category_services_pet.
Add to the security/library_security.xml file with the following XML:
This XML is adding one record to the groups model, res.groups, let's slowly break it down:
-
name is the group title. This is a simple string value. -
category_id is the related app. It is a relational field, so the ref attribute is used to link it to the category created before, using its XML ID. -
implied_ids is a one-to-many relational field and contains a list of groups that will also apply to users belonging to this group. In this case, we are adding a link to the existing internal user XML ID,base.group_user.
Step 3: Adding Automated Tests
Programming best practices include having automated tests for your code. This is even more important for dynamic languages such as Python—since there is no compilation step, you can't be sure there are no syntactic errors until the interpreter runs the code. The first principle is to write tests upfront, check that they fail, then develop code that, in the end, should pass the tests.
Odoo supports automated tests, based on Python's built-in unittest library. The tests need to meet a few requirements to be found and executed by the test runner, as follows:
- Tests are placed in the tests/ subdirectory. Unlike regular module Python code, this directory does not need to be imported into the top level __init__.py file. The test-running engine will look for these test directories in modules, and then run them.
- The test code files should have a name starting with test_ and should be imported from tests/__init__.py. The test code will be in classes derived from one of the several test objects available in the Odoo framework, imported from
odoo.tests.common. The most frequently used test class isTransactionCase. The test objects use thesetUp() method to initialize the data used by the test cases.
We plan for our app to have a library.kitten model. Let's add a simple test to confirm that a new kitten has been listed correctly.
1. Adding Test Cases
We will add a simple test to check whether a kitten is listed correctly. To do this, follow these steps:
1. Add a tests/__init__.py file with the following code:
from . import test_kitten
2. Then, add the actual test code, in the tests/test_book.py file, as follows:
The setUp() function gets a pointer to the Book model object and uses it to list a new kitten. The test_kitten_create test case adds a simple test case, checking that the created book has the expected default value for the active field.
2. Running Tests
Tests are run starting the server with the --test-enable option while installing or upgrading the module, as follows:
(env17) $ odoo -c ~/work17/project.conf -u cat_cattery --test-enable
The Odoo server will look for a tests/ subdirectory in the upgraded modules and will run them.
3. Testing Access Security
Access security can also be checked to confirm that users have the correct privileges granted.
By default, tests are executed with the Odoo internal user, __system__, which bypasses access security. So, we need to change the user running the tests, to check whether the right access security has been given to them.
To do this, let's modify the execution environment, self.env, setting the user attribute to the admin user, in the setUp method:
Step 4: Implementing the Model Layer
A Model contains data and business logic, described in Python code, using an object class derived from an Odoo template class. A model maps to a database table, and the Odoo framework takes care of all the database interactions, both in keeping the database structure in sync with the object and in translating all transactions to database instructions. The framework component responsible for this is the object relational mapping (ORM) component.
The detailed documentation can be found here.
1. Creating Data Models
The Python files for models should be placed inside a models subdirectory, and there should be one file for each model.
First, we will create a models/kitten.py file in the cat_cattery module, with the following content:
- The first line is a Python code import statement, to make the models and fields Odoo core objects available.
- The second line declares the new
at_breeder.kitten model. This is a Python class derived frommodels.Model. - The
_name attribute defines the unique model ID (UID) that Odoo uses to refer to this model. Model IDs use dots (.) to separate their keywords. - The
_description model attribute displays a name for the model that can be used in some user messages to refer to a record in the model. - The last line declares a model field,
name - a reserved field name which the Odoo framework makes special use of them by default. There are various field types corresponding to different data types. We will expand much more on this later. For now, it suffices to have the minimal requirement of one field to declare our model.
We also want to have a second model to represent the breeds of our pedigreed kittens, so, in the cat_cattery module, let's create a models/breed.py file:
Don't forget to have these model imported in the models/__init__.py file:
from . import kitten, breed
2. Model Fields
There are two broad categories of fields: ‘simple’ fields, which are atomic values stored directly in the model’s table, and ‘relational’ fields, which link records (of the same or different models), however, there are other less commonly used field types, yet just as important.
2.1 Simple Fields
Simple field examples are Boolean, Float, Char, Text, Date and Selection.
Now, let's add the a few basic fields to our models/kitten.py model and then break down the usecases of particular field types:
active is another reserved filed name and uses the Boolean field. By default, only active records are shown, and inactive records are automatically hidden.-
gender,state areSelection fields, which encapsulates an exclusive choice between different values and designates a value by default. -
birth_date uses aDate field, which is a wrap of the python date object. It's also equipped with a Default Method as specified in thedefaultparameter (all default methods are defined with the_default prefix). This is to ensure the legal age of at least 8 weeks old requirement is applied to all of our soon-to-be adopted kittens. -
color is aChar filed which will be represented as a Python unicode str and a SQL VARCHAR. -
image uses aBinary field that allows files to stored in the database in binary code. For our case, we'll utilize it to store and display our kittens' profile images.
2.2 Computed Fields
So far fields have been stored directly in and retrieved directly from the database. Fields can also be computed. In this case, the field’s value is not retrieved from the database but computed on-the-fly by calling a method of the model.
By convention, compute methods are private, and can only be called from the business tier. Similar to Default Methods, private methods have a name starting with an underscore _.
The value of a computed field usually depends on the values of other fields in the computed record. The Odoo ORM expects the developer to specify those dependencies on the compute method with the decorator depends(), via the api object.
Here how it gets done in the Kitten model:
The age field is passed the computed method _compute_age via the argument compute, where each kitten's age is determined by the number of weeks counted backward from today.
2.3 Relational Fields
In real life, most business operation structures would require more than one data model and these models often communicate via common links between them.
In the case of a Cat Cattery business, one most obvious example is the way to which our pure-bred kittens can be referred to particular breeds of their origins.
Thus, one can imagine, a kitten can only be linked to one breed and a breed can be referred to many kittens. This is supported by the Many2one and the One2many concepts.
Here are how they look like in the Kitten and Breed models respectively:
breed_id is a Many2one field, or in the database jargon - a foreign key (FK). The data model (or table) it is related to is specified by the input argument cat_breeder.breedwhich is the unique ID of the model Breed's _name attribute.
Conceptually similar, the kitten_ids uses the One2many field, which is the inverse of Many2one and refers to the Kitten model by its unique ID, but also specifies the specific field in the Kitten model it is related to - the breed_id field.
Now, You might have notice after reloading Odoo either the following messages:
The model cat_cattery.kitten has no access rules, consider adding one.
The model cat_cattery.breed has no access rules, consider adding one.
Don't worry, our 2 models have been created in the database, BUT, it is not yet available to users. We need a menu item for that, but that won't be enough. For the menu item to be visible, users first need to be granted access to the new model.
Step 5: Setting Up Access Security
If a model has no access rule, it can not be used by anyone just yet. To get a picture of what information is needed to add access rules to a model, on the web client, navigate to Settings | Technical | Security | Access Rights, as illustrated in the following screenshot:
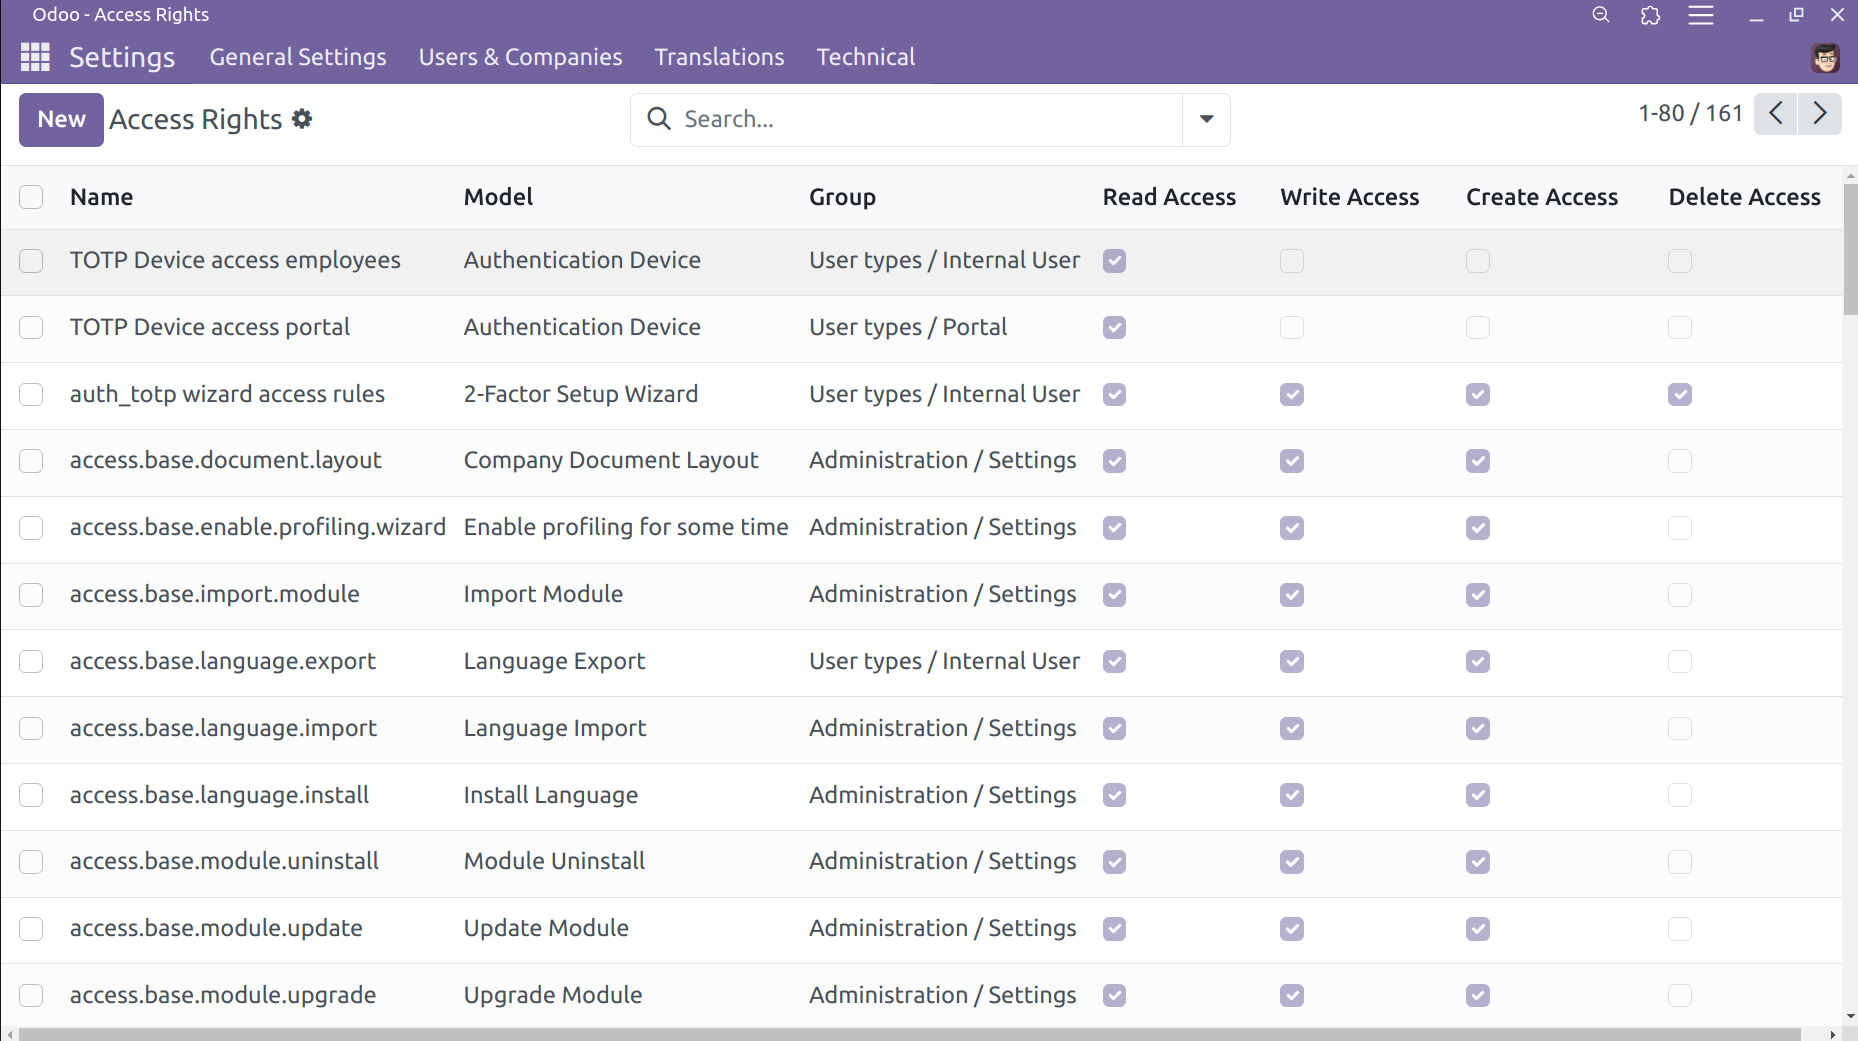
These access rights are also referred to as an access control list or ACL, for a security group, it indicates what kinds of actions are allowed on records: read, write, create, and delete.
For the Cat Cattery app, we will grant users access to read, write, and create kitten records.
This data can be provided by a CSV file, loading records into the ir.model.access model. The filename for CSV data files must match the model ID we are loading data into.
So we should add the security/ir.model.access.csv file, with the following content:
The first line of the file has the field names. These are the columns provided in our CSV file:
-
id is the record's external ID (also known as XML ID). It should be unique in our module. -
name is a descriptive title. It is informative and it is recommended for it to be unique. -
model_id is the external ID for the model we are giving access to. Models have XML IDs automatically generated by the ORM; for library.book, the ID is model_library_book. -
group_id identifies the security group to give permissions to. We grant access to the security groups created before: library_group_user and library_ group_manager. - The
perm_... fields grant access to the read, write, create, or unlink (delete) operations. We used 1 for yes/true and 0 for no/false.
We must not forget to reference this new file in the data key in the __manifest__.py file. It should look like this:
Step 6: Backend View Layer
The view layer describes the UI. Views are defined using XML, which is used by the web client framework to dynamically generate data-aware HTML views.
Menu items can execute window actions to render views. For example, the Users menu item processes a window action, also called Users, that in turn renders a view
composition, with a list and a form.
Several view types are available. The three most commonly used views are the List
(also called Tree for historical reasons), the Form, and the Search options available
in the top-right search box.
1. Menu Items & Menu Actions
The Cat Cattery app now has the model to store book data, and we want to have it available on the UI. The first thing to do is add the corresponding menu options.
1.1 Menu Items
This is what the menu looks like right now:
Edit the views/cat_cattery_menus.xml file and add the menu items and the window actions for the Kitten and Breed models, as follows:
The menuitem that defines the first and second level submenu options named "Kittens" and "Breeds". It also binds the submenus to the window actions of action_breeder_kitten and action_breeder_breed, which will be defined in the model views next.
The "Cat Cattery" now appears in menu, but not yet accessible:
1.2 Menu Actions
In the views directory, create the following 2 files: cat_cattery_kitten_view.xml, cat_cattery_breed_view.xml. These 2 XML files will be the view structures of the 2 models: cat_cattery.kitten and cat_cattery.breed, detail will be explained in Step 2.
Let's add actions to these models so that users can navigate them via menu items.
Respectively, add the following to cat_cattery_kitten_view.xml:
And cat_cattery_breed_view.xml:
Let's break down the elements in both of these files:
-
id is an external identifier. It can be used to refer to the record (without knowing its in-database identifier). -
model has a fixed value ofir.actions.act_window (Window Actions -ir.actions.act_window). -
name is the name of the action. -
res_model is the model which the action applies to. -
view_mode are the views that will be available; in this case they are the list (tree) and form views.
Don't forget to have them imported in the __manifest__.py file:
Now that we have working Menu items for navigation:
2. List (Tree) Views
Views are data records stored in the database, in the ir.ui.view model which can be referenced by unique XML ID's. Right now, both of our cat_cattery.kitten and cat_cattery.breed models does yet not have their views, we need to add data files, with <record> elements describing the views.
Lists are defined using a <tree> view type. Their structure is quite straightforward, the <tree> top element should include the fields to present as columns.
Go back into views/cat_cattery_kitten_view.xml file and add this following:
This view is for the cat_cattery.kitten model, and ismnamed breeder.kitten.tree. The most important field is arch as it contains the actual tree view definition where we declare the field's we want to display - name, breed_id, gender, and age.
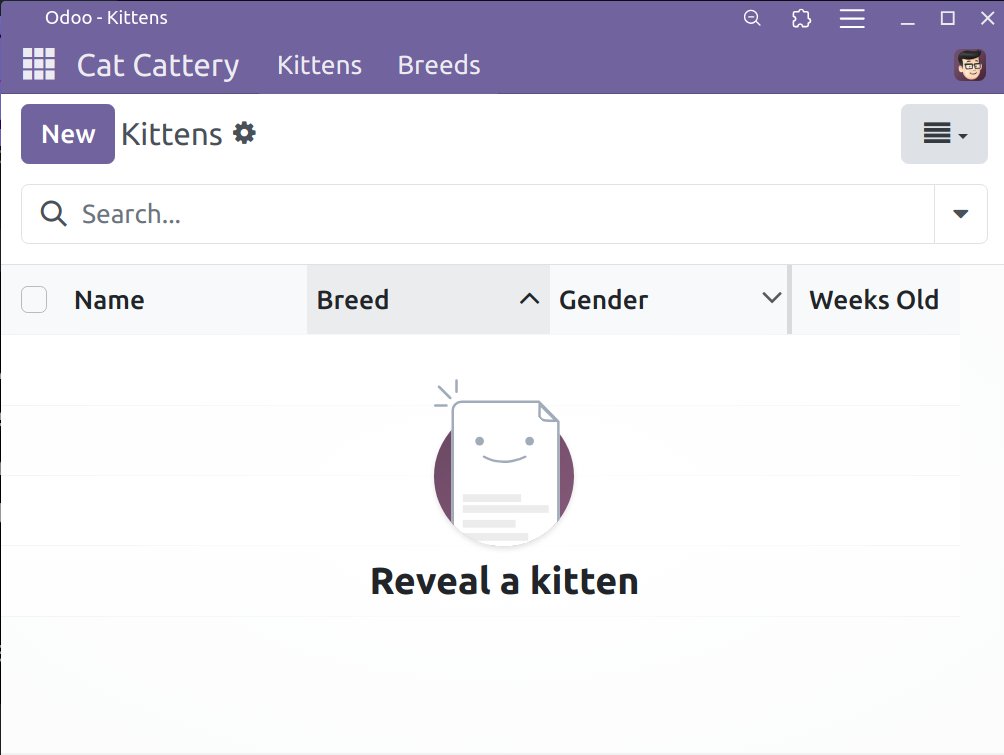
Now the Kitten model has a look:
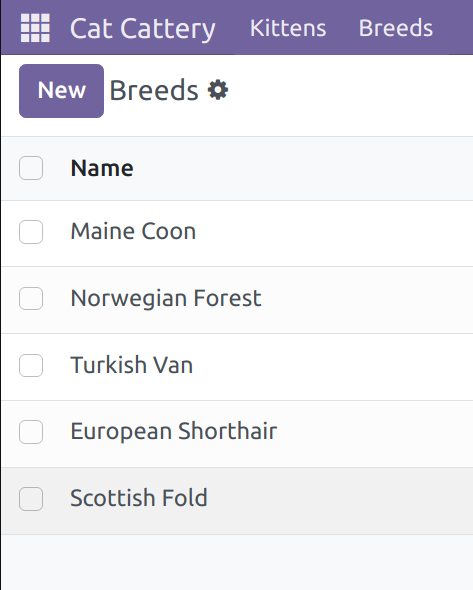
Similarly, add the following to the views/cat_cattery_breed_view.xml file:
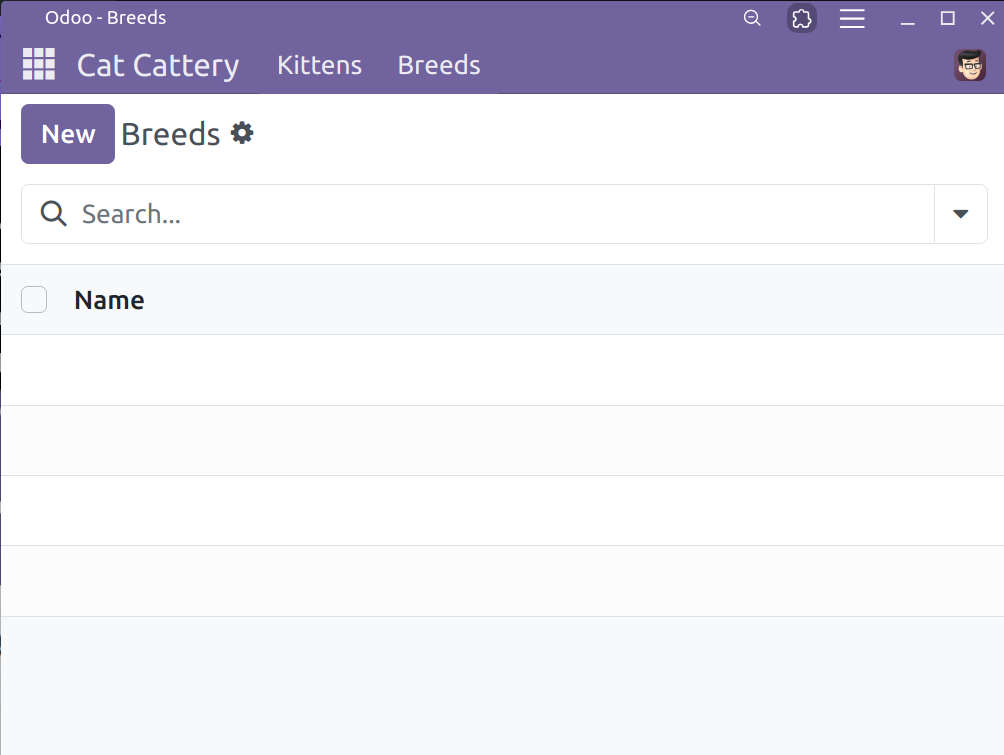
And what it looks like in Breed:
3. Form views
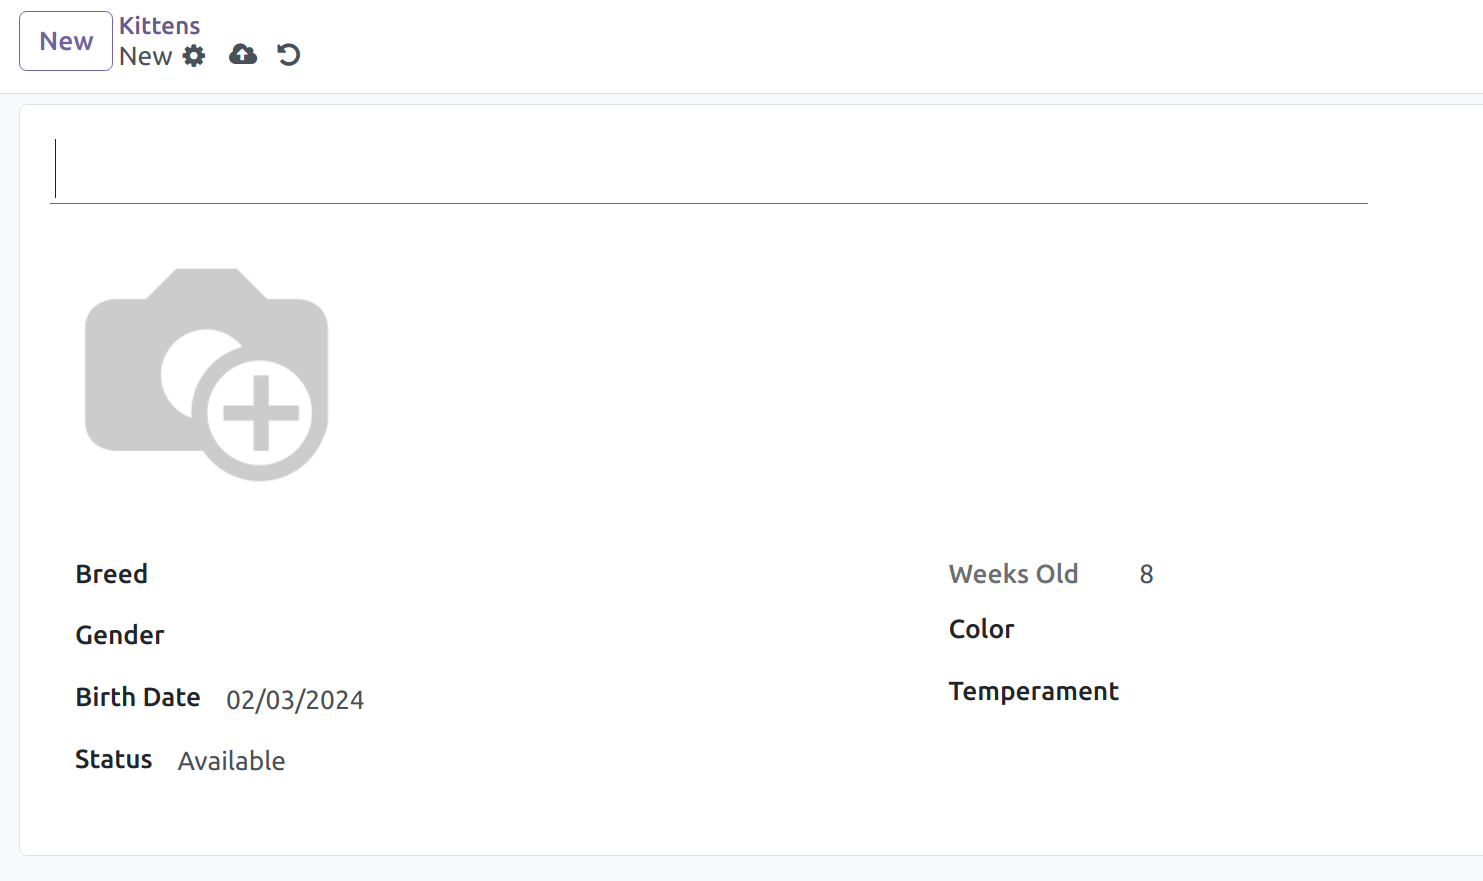
Forms are used to create and edit single records. Their root element is <form>. They are composed of high-level structure elements (groups and notebooks) and interactive elements (buttons and fields).
Let's add the following to views/cat_cattery_kitten_view.xml file:
Inside form, we design a sheet where the kitten's name is the title, and breed_id, gender, birth_date, age, color, temperament, and state are displayed into group's .Also, for the image field, the widget attribute is used, you can learn more about it here.
The Kitten's Form looks like this:
And a basic Form view for views/cat_cattery_breed_view.xml file:
Alrighty! Now that we have established the Lists and Forms for our models, it is time to populate the models with our lovely kittens.
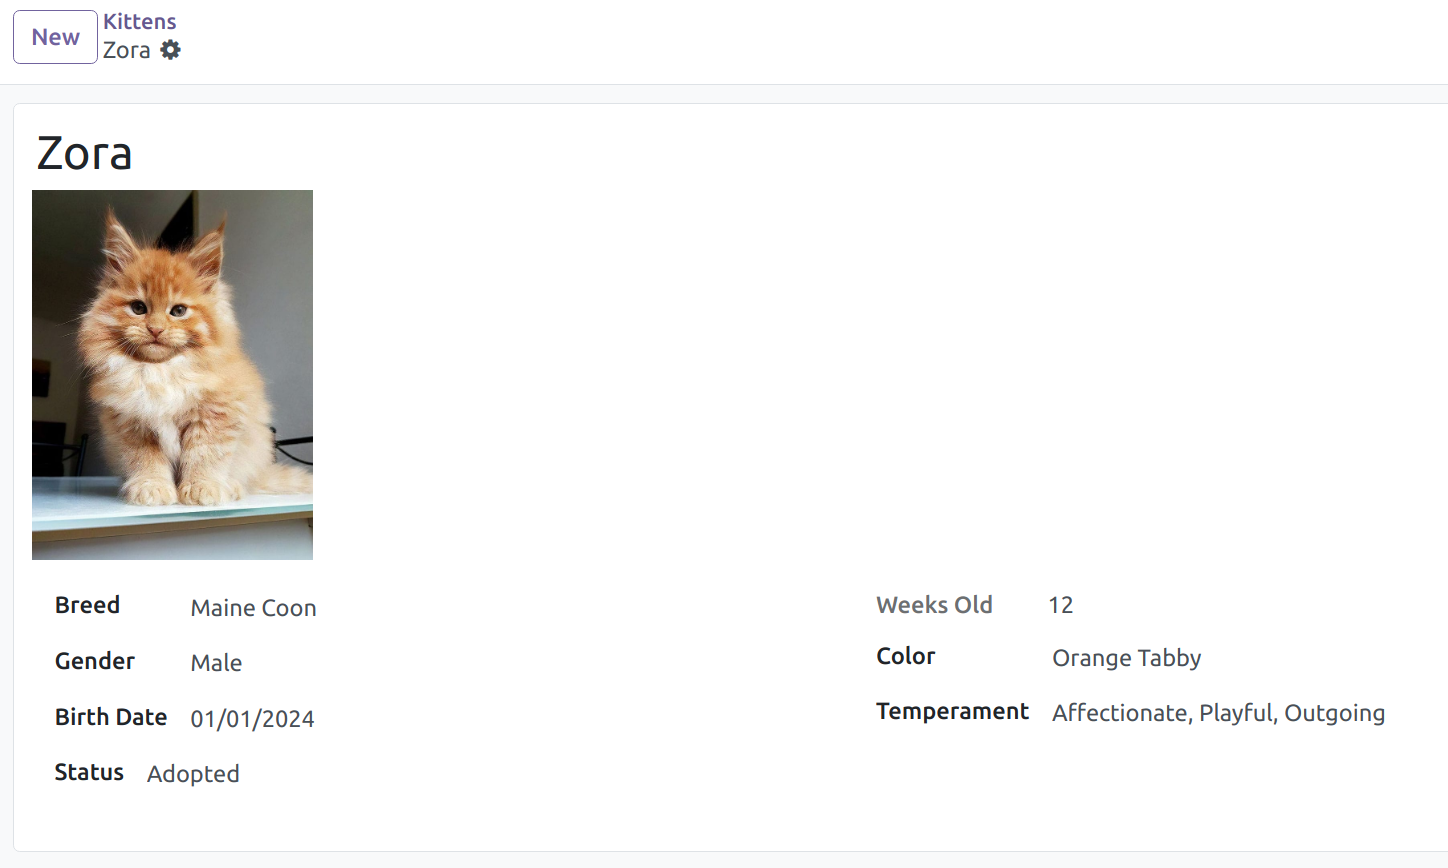
Since our shop is newly opened and deals with cats, it makes sense to go ahead and enlist a crew of 9 kittens (right!?). But first, we as professional breeders, also wanted to offer a diversity of feline breeds, so let's have the following 5: Maine Coon, Norwegian Forest, Turkish Van, European Shorthair, and Scottish Fold.
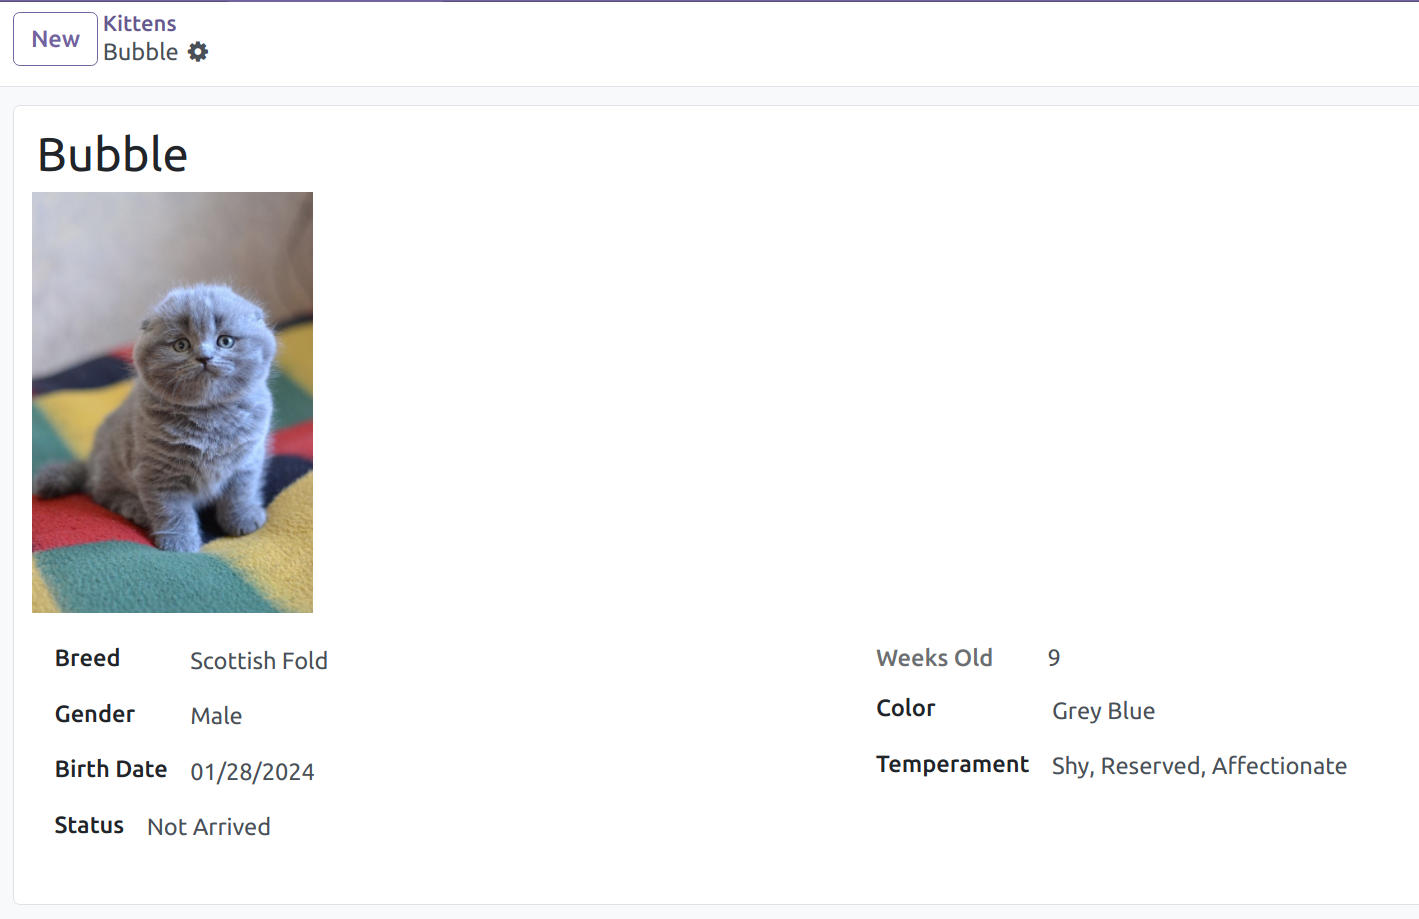
Now it's our kittens, here are Zora and Bubble in Form view:
And the whole crew in List view:
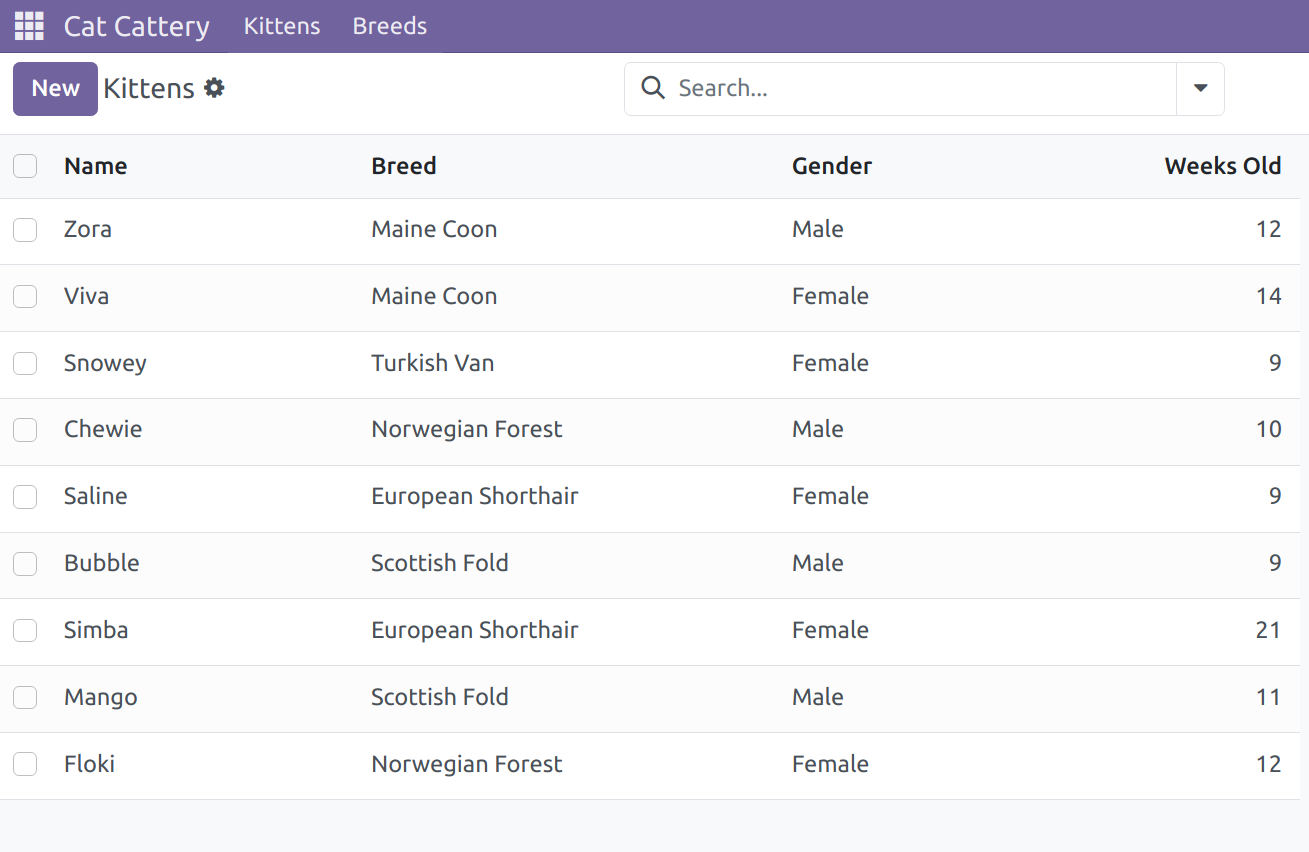
4. Search Views
At the top-right corner of the list, Odoo displays a search box. The fields it searches in and the available filters are defined by a <search> view.

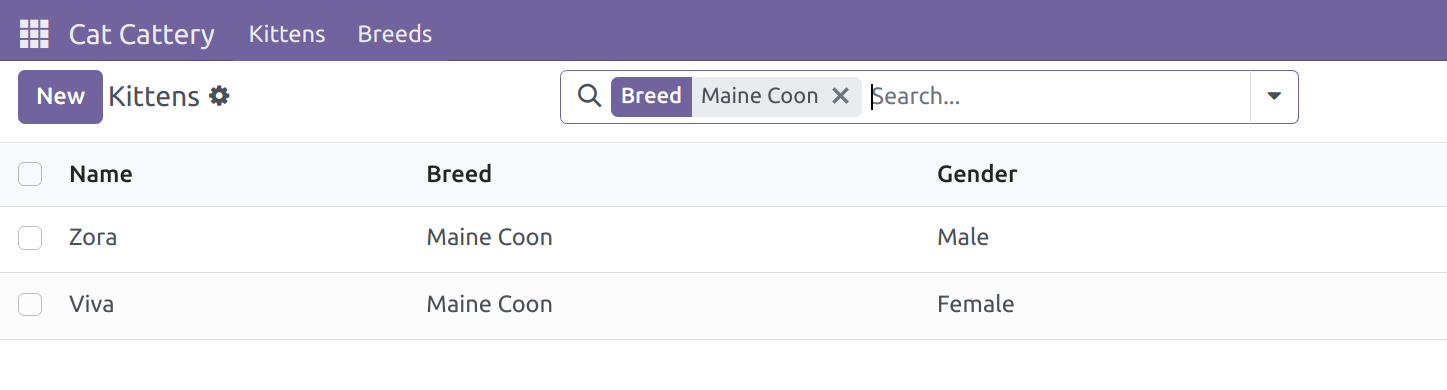
We want our "Breed" field to be the default search filter so that visitors can easily look for their desired predigreed kittens. So, in the views/cat_cattery_kitten_view.xml file, add the following:
The <filter> element adds predefined filter conditions, which can be toggled with a user click.
The domain attribute is an expression that forces a filter for the records that can be browsed in the opened views. You can learn more about the syntax here.
Great! Now the kittens can be easily found by their breeds:
5. Action Buttons
So far we have mostly built our module by declaring fields and views. In step 4, we introduced how business logic works with the concept of computed fields. Do you know we can create interactive UI components by linking business logic to certain objects, i.e. action buttons.
In our Cat Cattery example, we want potential adopters to have an easiest process of adopting our kittens - simply by clicking a button. So, let's do that!
First, let's come back to our Kitten - cat_cattery.kitten model in the models/kitten.py file and add a method:
Here, the action_adopt will be performed in a Form, thus the self object represents a single recordset and does not need a loop.
Also, the UserError object is imported to raise an exception to our users, letting the adopters know the current kitten either has been adopted or not yet arrived to the cattery.
Now, add the following to the Form view in the views/cat_cattery_kitten_view.xml file:
The <header> element is added to contain the action <button/>, where name="action_adopt" links it to the business logic method in the cat_cattery.kitten model, and the invisible="state != 'available'" hides the button if the field state is not set as "available".
Here 's how it works with Snowey:
6. Kanban Views
Kanban views are a standard Odoo view (like the form and list views), but their structure is much more flexible. In fact, the structure of each card is a mix of form elements (including basic HTML) and QWeb.
The definition of a Kanban view is similar to the definition of the list and form views, except that their root element is <kanban>. Let's see it by creating a simple Kanban view for the cat_cattery.kiteen model!
Add the following to the views/cat_cattery_kitten_view.xml file:
<templates>: defines a list of QWeb Templates templates - a shortcut for an ir.ui.view record, the base model where templates are stored.. Kanban views must define at least one root template kanban-box, which will be rendered once for each record.- In
<kanban>, thedefault_group_by="breed_id"attribute groups the kittens by their breeds and therecords_draggable="0" attribute prevents the records from being moved to other groups. -
<t t-name="kanban-box">: the<t> tag is a placeholder element for QWeb directives. In this case, it is used to set the name of the template to kanban-box -
<div class="oe_kanban_global_click">: theoe_kanban_global_click class makes the<div> clickable to open a record. -
<field/>: this will add the data fields to the view by their names. -
<div t-if="record.state.raw_value == 'available'": Qweb conditional directive to display the button"I've found a home!" if thestate of the record isavailable.
Voila! The Kanban view is pretty neat:
Step 7: Website User Interface (UI)
Odoo also provides a web development framework, to develop website features closely integrated with the backend apps. We will explore how this is done by creating a simple web page to display a list of all currently available kittens.
1. Adding Endpoint Controllers
Web Controllers are the components responsible for rendering web pages. A controller is a Python method in an http.Controller derived class. The method is bound to one or more URL endpoints using the @http.route controller.
To add a controller, first edit the cat_cattery/__init__.py file to have it also import the controllers subdirectory, as follows:
Code for controllers is expected to be inside a /controllers subdirectory. A dd a cat_cattery/controllers/__init__.py file with:
Then, add the actual file for the controller, cat_cattery/controllers/main.py, with the following code:
- We created a controller object class, derived from
http.Controller. - The
@http.route decorator declares the URL endpoint to be bound —/cat_breeder/kitten - We accessed the runtime environment using
http.request.env["cat_breeder.kitten"]. We use it to get a recordset with all listed kittens. - Finally, the method
http.request.render() is returned to process a template namedbreeder_kitten_list_template and generate the output HTML. We can also make variables available to the template through a dictionary -{'kittens': kittens}
Now, If we now restart the Odoo server to reload the Python code and try accessing the /cat_breeder/kitten URL ,we should get an error message in the server log: ValueError: External ID not found in the system: cat_cattery.breeder_kitten_list_template. This is expected since we haven't defined that template yet, so let's do that next!.
2. Adding a QWeb Template
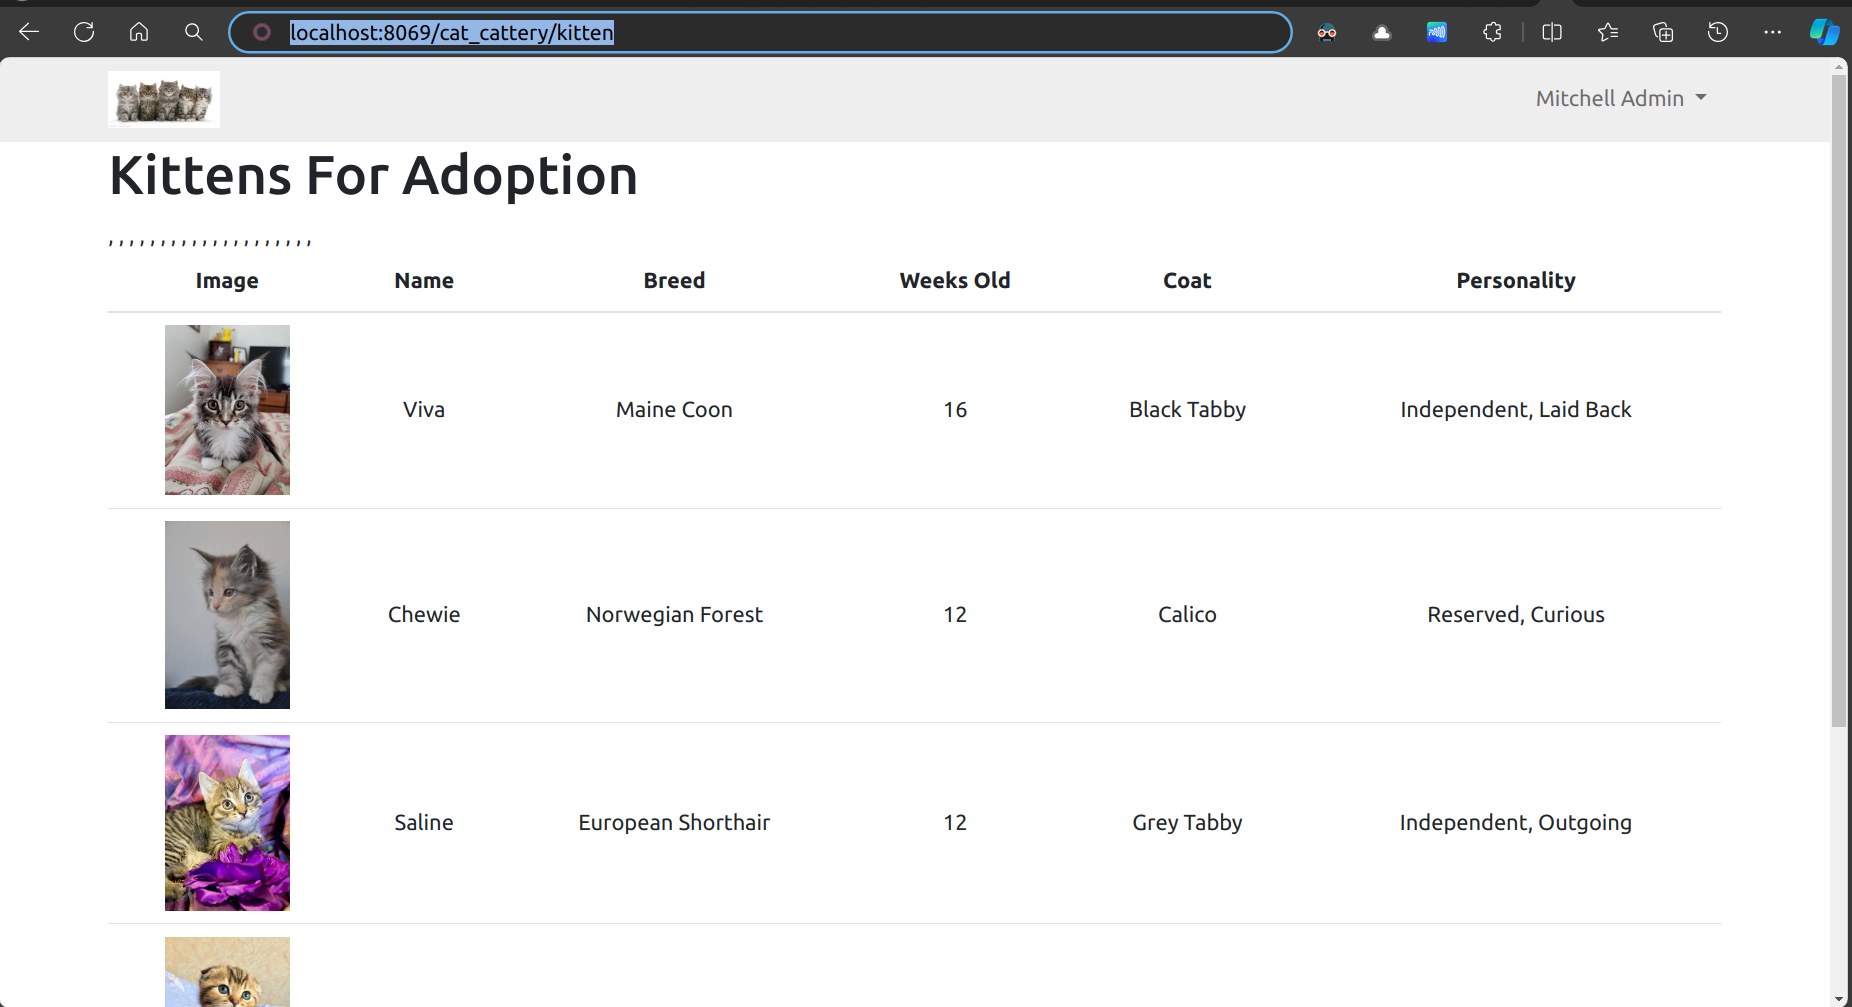
QWeb Templates are also stored along with the other Odoo views, and the corresponding data files are usually stored in the /views subdirectory. Let's add the views/breeder_kitten_list_template.xml file, as follows:
-
<templates>: defines a list of QWeb templates. - The directive
<t t-call="web.frontend_layout"> makes the template HTML be rendered as an Odoo frontend web page, including page headers and footers. - The
t-foreach attribute is a Qweb iteration directive which takes an expression -kittens returning the collection to iterate on, and a second parametert-as providing the name to use for the “current item” of the iteration -kitten. - The
t-if attribute is a Qweb conditional directive that evaluates whether a kitten is available -kitten.state == 'available', and render the element if it's True. - Finally, The
t-fielddirective is be used to access individual kitten's record fields -image,name,breed_id,age,color, andtemperament.
Make sure to have the breeder_kitten_list_template.xml file imported in cat_cattery/__manifest__.py :
Go to the URL <your_domain>/cat_cattery/kitten
This is a short overview of Odoo's Frontend and Qweb features, we'll go in further depth in the next article, where you will learn how to create a Qweb Report.
Congratulations!
We have completed a long but very productive Tour-de-France guide to Odoo development. The complete source code of this tutorial can be found here.
You now have equipped yourself with all essential knowledge needed to build your very own Odoo applications. In the meantime, let's take a well deserved break and play with the kittens!